Washi Paper Guitars: Final Makergrant

After varying levels of success, I felt like I had learned the proper method to achieve my goal of washi paper guitars. (See my other Behance pages for the previous parts of my journey.) Facing the guitars left an impossibly rough finish on the epoxy, and destroyed an otherwise perfect finish. Taking all of the knowledge I had accrued, I decided to remake the guitars and not face the top, leaving the natural epoxy finish.
I began this project the same way as the previous attempts. I started with two blocks of wood, that I made four square, and glued together. I planed it to be roughly a quarter of an inch less thick than my final desired thickness.


The alder I used had a few holes I needed to fill. I bought fast hardening TotalBoat epoxy resin and used that to fill the holes. I mixed some of the resin with black powder to make the resin black, but ultimately, I preferred the undyed look, since you could see deeper into the wood.

I then used wood glue to attach the washi paper to the wood. The wood glue was spread in a very thin layer over the wood, and the washi paper was attached, making very careful to prevent wrinkles from forming. After it was glued on, I sprayed Modge Podge Acrylic Sealer on the paper to seal the paper. The paper needed to be sealed before the epoxy was poured on top. Otherwise, the epoxy would have seeped through the paper and affected the colors of the paper. (Different washi paper can have different thickness. I've found that some paper, regardless of how many coats of sealer, will still have discoloration after pouring the epoxy.)


I then did the resin pour over the blank. I just followed Total Boat's Instructions. The resin left a crystal clear finish over the paper.


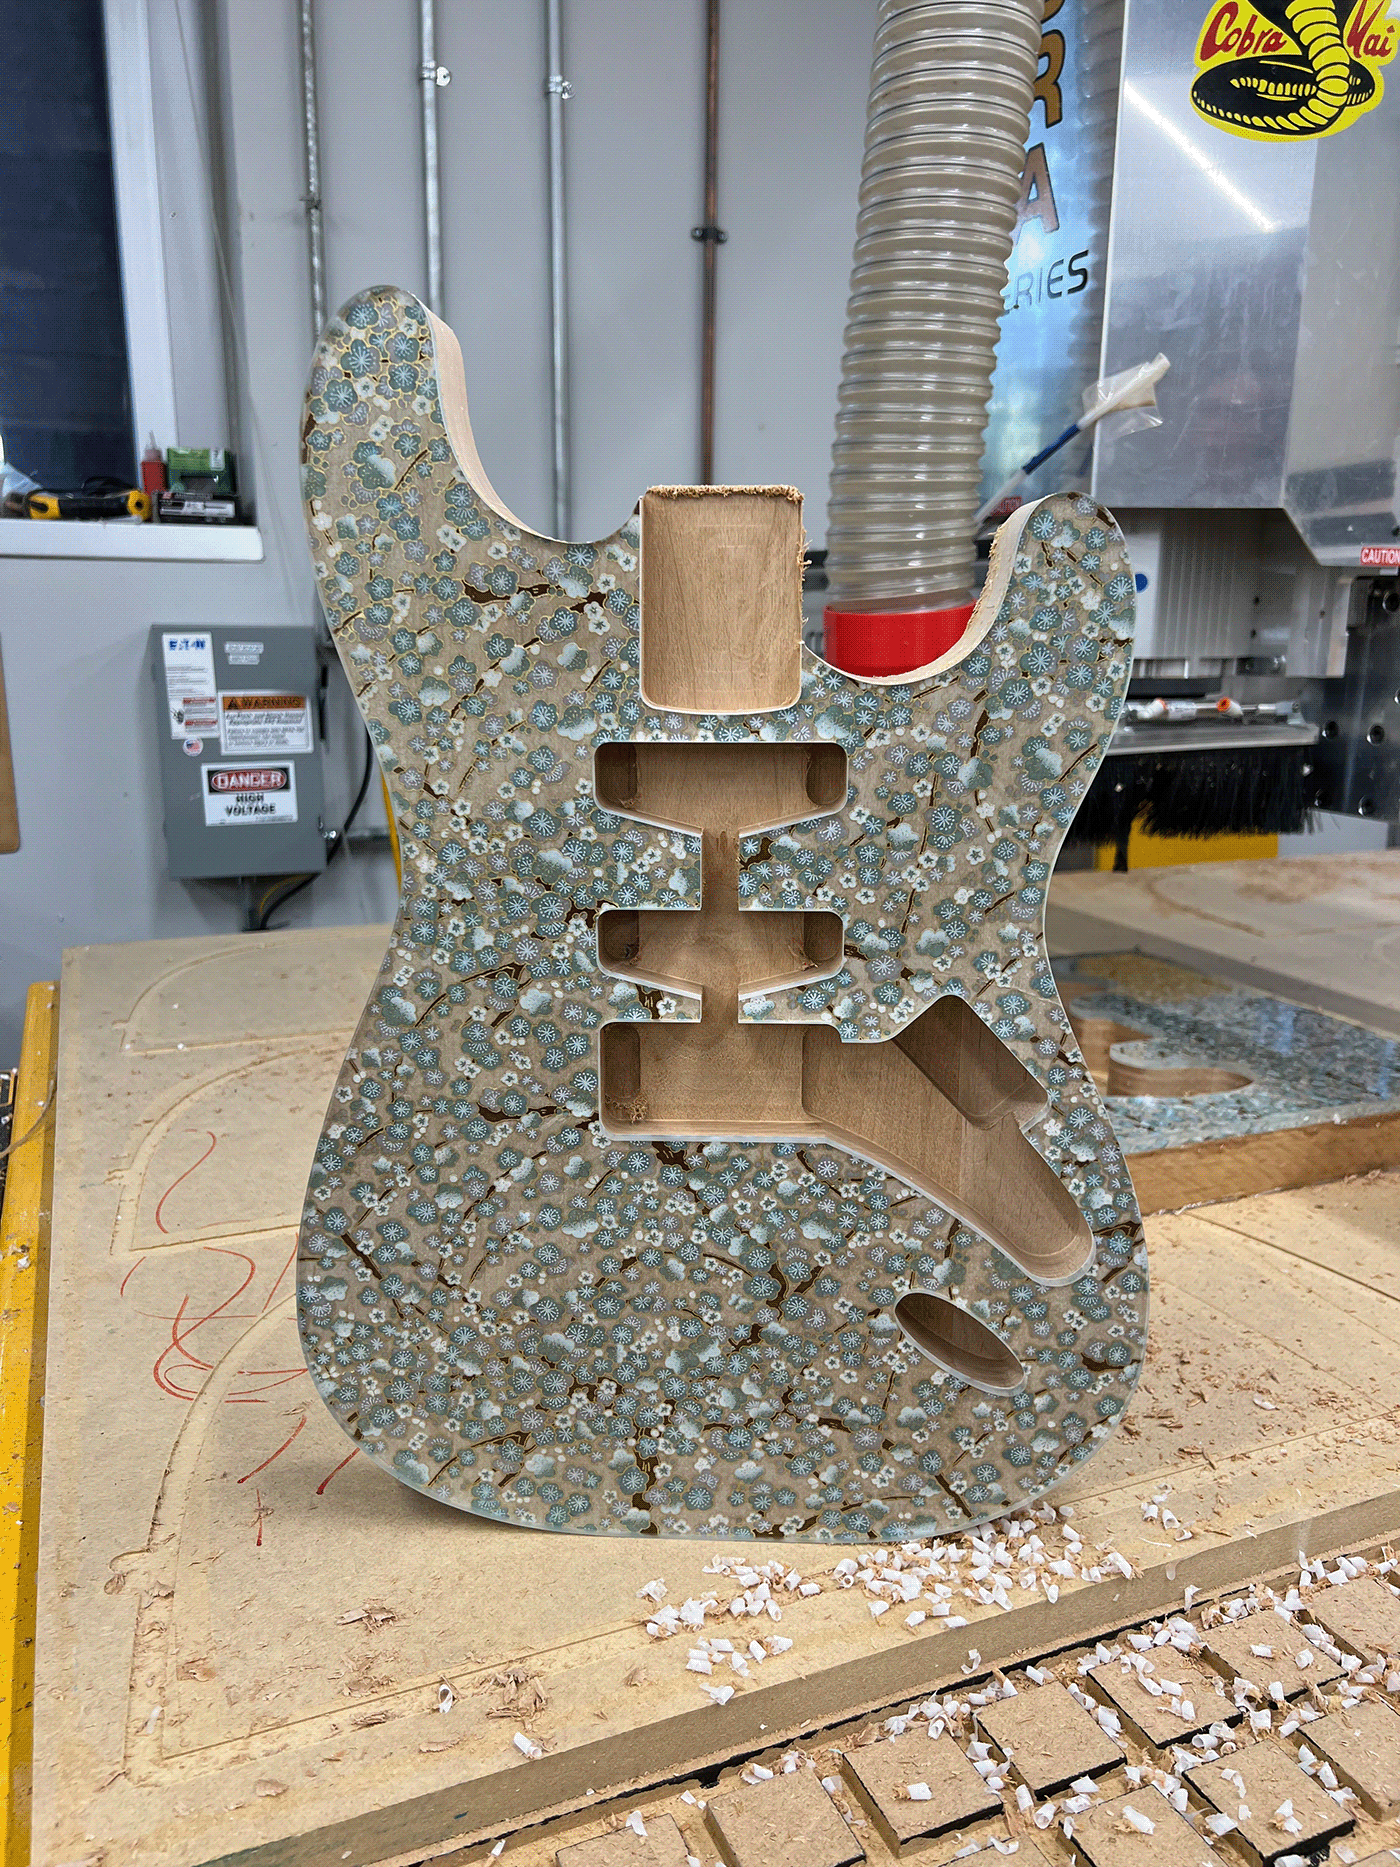
After the resin pour, I CNC'd the bodies. Without facing the top, the mirror finish was left in tact from the pour. The CNC job worked very well, and cut through the material easily. I added some extra tolerance to the neck pocket before cutting in order to make sure the neck fit snugly.


The final steps of the project was to carve out the belly carve on the back of the guitars, and then do a roundover on the back. I did this with a rasp, and it went very quickly. The route I did with the table router. Then, I sanded the body to 320, wet sanded, and did a wipe on poly finish. After doing several coats of poly, the bodies were done.

These guitars turned out exactly how I wanted. I think after all of my testing and failed efforts, I have finally learned exactly the best ways to make these guitars. These last two turned out exactly how I wanted them to, and I couldn't be happier. This has been a very long project, but I learned a lot about the process and about thinking on my feet. If I had given up at every setback (and there were a lot), I would never have completed this project. I am very grateful for the support of the Invention studio throughout my project.

Funded and supported by the Invention Studio at Georgia Tech, a student organization.

